Want a stylish TV unit that doesn't cost a fortune? This DIY hack is for you!
- Replies 2
We have to admit – not all of us are in the financial position to decorate our homes with designer furniture and accessories. It can be hard to justify the cost.
On the brighter side, though, we have skills and craftsmanship that we can always count on. We don't need home decor that costs hundreds of dollars, we can make our own instead!
A renowned home stylist demonstrated to us how to make an elegant and classy-looking entertainment unit from scratch, one that resembles designer versions that can cost as much as $800.
Brisbane-based designer Geneva Vanderzeil came up with the idea of the wooden furniture on her own. Using only a bunch of affordable supplies from her local hardware store and a few woodworking tools she already had at home, she turned her idea into reality!
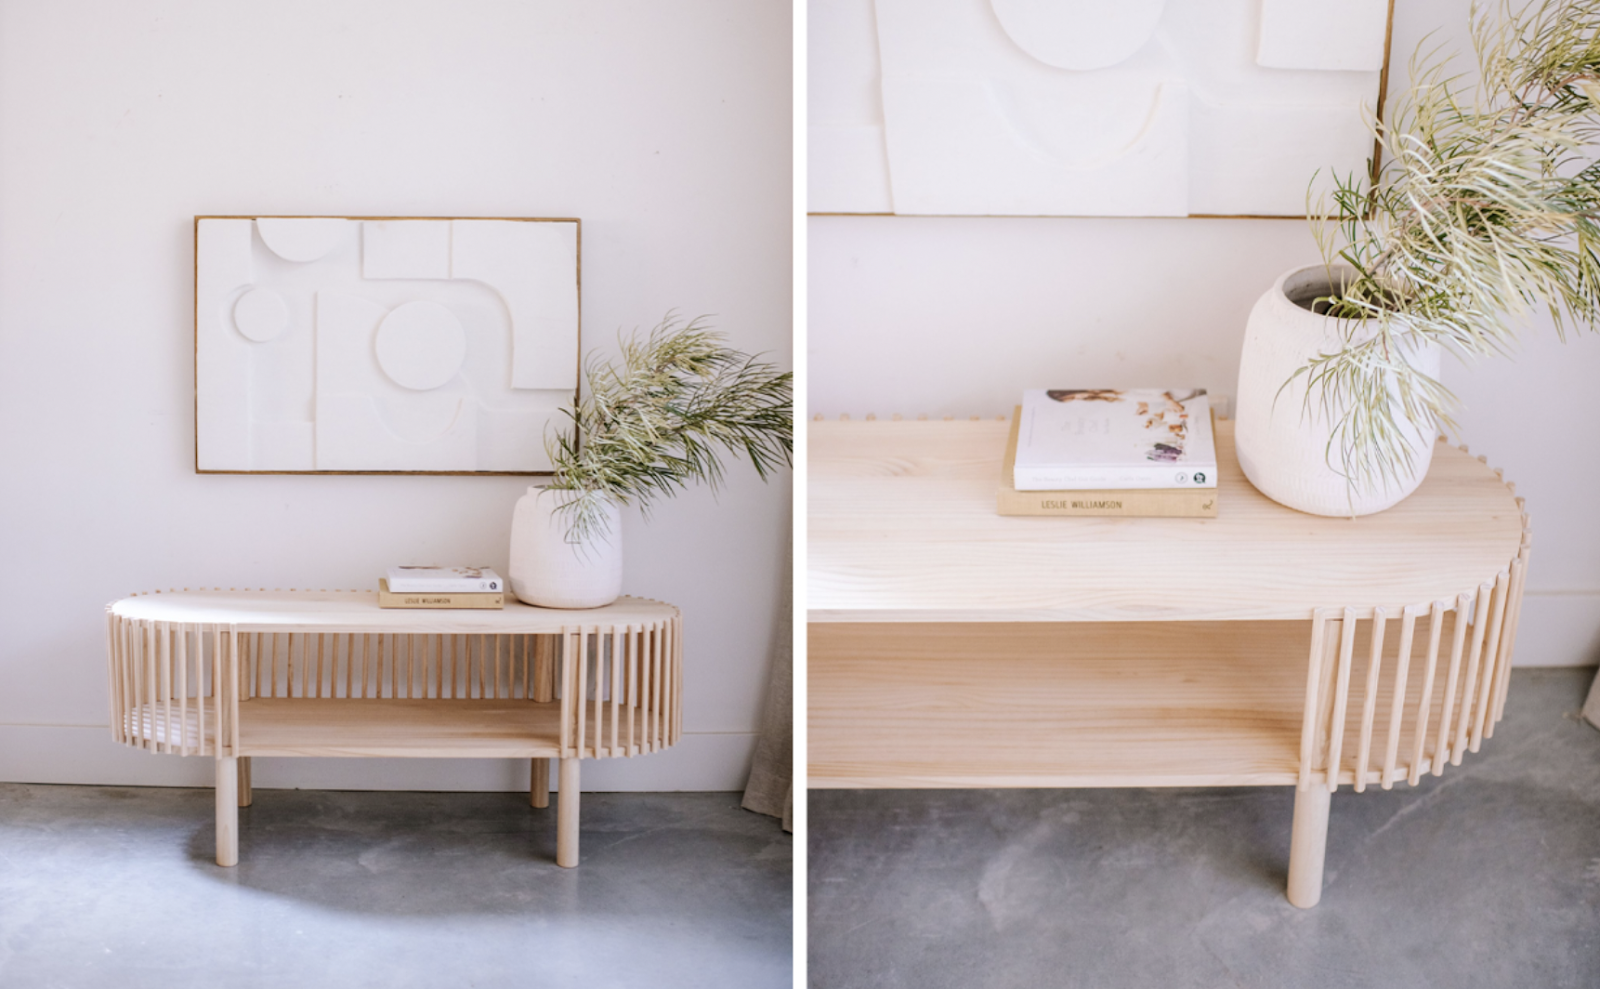
DIY queen shares how she made a chic entertainment unit from scratch Credit: Collective Gen.
In a blog post on her popular home styling website, Geneva said that she has been thinking of making a rounded TV unit with slatting made from dowels for some time now.
After quite a bit of planning and researching, she finally jumped into it and decided to put her crafting skills to the test.
Here are the items she used, all sourced from Bunnings:
And if you're looking to do this DIY project as well, here are the steps to follow!
(Be aware, however, that the procedure will involve some construction work, such as sawing and drilling wood, so make sure you have some assistance with you.)
First, round off the edges of your two pine boards. Make sure you do one board and then use it as a model for the next one so that they both look the same.
Next, mark on one of the pine pieces where you want the legs to go, drill four small holes, and then screw in four of the wooden furniture legs.
After that, drill a hole in the bottom of the other four legs and screw the existing screws deeper into each leg, so they don't go through the top of the unit.
Screw the second set of legs onto the screws that were sticking out of the pine piece's topside.
Drill four holes into the bottom of the last piece of pine. Then, put it on top of the legs of the wooden furniture and hammer it down. Make sure to use a cloth and a rubber mallet for this step so you don't damage the wood.
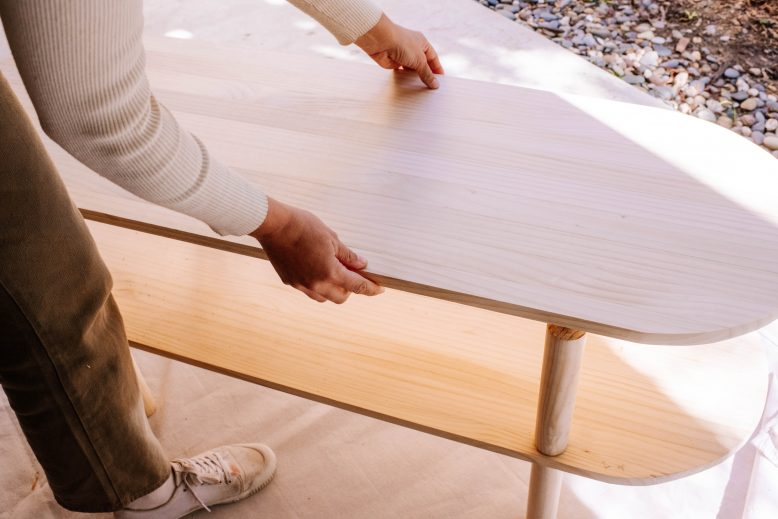
Geneva said the DIY project turned out the way she wanted and was very easy. Credit: Collective Gen.
Now that the main part of this project is done, take some pine dowels, measure them, and cut them into pieces of the same length.
Attach them all to the TV stand with glue. Once all the dowels are glued in place, you should let the unit dry overnight.
And voila, it's finished. Now you have an amazing wooden TV unit; it can even double as a mini table!
What are your thoughts, folks? This looks like a good DIY project to make over the weekend, doesn’t it?
On the brighter side, though, we have skills and craftsmanship that we can always count on. We don't need home decor that costs hundreds of dollars, we can make our own instead!
A renowned home stylist demonstrated to us how to make an elegant and classy-looking entertainment unit from scratch, one that resembles designer versions that can cost as much as $800.
Brisbane-based designer Geneva Vanderzeil came up with the idea of the wooden furniture on her own. Using only a bunch of affordable supplies from her local hardware store and a few woodworking tools she already had at home, she turned her idea into reality!
DIY queen shares how she made a chic entertainment unit from scratch Credit: Collective Gen.
In a blog post on her popular home styling website, Geneva said that she has been thinking of making a rounded TV unit with slatting made from dowels for some time now.
After quite a bit of planning and researching, she finally jumped into it and decided to put her crafting skills to the test.
Here are the items she used, all sourced from Bunnings:
- 2 x SpecRite 1200 x 405mm 18mm Timber Panel Pine FJ Laminated - $39 each
- 8 x Adoored 230mm Pine Round Furniture Leg - $6.90 each
- 15 x Porta 12.5mm 1.2m Dowel Pine Clear - $5.20 each
- Gorilla 236ml Wood Glue - $14.10
- Woodworking tools such as a jigsaw, a sander, and a drill
And if you're looking to do this DIY project as well, here are the steps to follow!
(Be aware, however, that the procedure will involve some construction work, such as sawing and drilling wood, so make sure you have some assistance with you.)
First, round off the edges of your two pine boards. Make sure you do one board and then use it as a model for the next one so that they both look the same.
Next, mark on one of the pine pieces where you want the legs to go, drill four small holes, and then screw in four of the wooden furniture legs.
After that, drill a hole in the bottom of the other four legs and screw the existing screws deeper into each leg, so they don't go through the top of the unit.
Screw the second set of legs onto the screws that were sticking out of the pine piece's topside.
Drill four holes into the bottom of the last piece of pine. Then, put it on top of the legs of the wooden furniture and hammer it down. Make sure to use a cloth and a rubber mallet for this step so you don't damage the wood.
Geneva said the DIY project turned out the way she wanted and was very easy. Credit: Collective Gen.
Now that the main part of this project is done, take some pine dowels, measure them, and cut them into pieces of the same length.
Attach them all to the TV stand with glue. Once all the dowels are glued in place, you should let the unit dry overnight.
And voila, it's finished. Now you have an amazing wooden TV unit; it can even double as a mini table!
What are your thoughts, folks? This looks like a good DIY project to make over the weekend, doesn’t it?