Money-Saving Tip: Make an At-Home Mending Kit
- Replies 9
We all want to save money while remaining stylish, but sadly, keeping up with the latest fashion trends can get expensive. Fortunately, there is an easy way to extend the life of your clothes while cutting costs.
If you've been meaning to start mending clothing, it's not as hard as you may think. All it really takes is a good set of tools, some practice and a 'can do' attitude.
Rel Vild, the owner of Loom Fabrics, and Holly Simpson, the owner of the repair service Hot Dog Workshop – both experts in the craft of mending – are here to explain how to build an at-home repair kit.
Of course, the most important aspect of mending your own clothes is having the right tools. However, you don't need to break the budget for a quality repair job.
If you're on a budget (which we all are, these days), Rel Vild recommends looking for secondhand items from haberdashery stores or specialist retailers. You may find some vintage tools in great condition, which will perform the tasks perfectly and save you some money too.
What tools do you need?
The first and most important item for your mending kit is good quality tailoring shears. These scissors should only be used for cutting fabrics – don't let the grandkids use them for craftwork or to cut paper, as it may cause them to become blunt quickly.
In addition to the shears, we recommend getting a smaller pair of scissors or even a thread snipper. This is great for trimming up after use as well as for cutting threads.
Another indispensable tool for this hobby is an unpicker, a small tool with a pointed metal hook that makes easy work of stitching errors. Vild prefers larger unpickers because they are easier to manage, unlike the tiny ones which are harder to control.
When shopping for needles, she suggests buying them in packets that contain a variety of sizes, since it can take some time to figure out which ones operate best for you.
She also advises to only purchase zippers when you need them, according to the needs of the project at hand. 'Otherwise, they will sit unused,' she says.

Other items you will need are pins with glass heads, a tape measure, and maybe even a small embroidery hoop. Most haberdasheries will stock these items as well as things like a needle threader and a thimble.
Other helpful items include iron-on patches, iron-on mending tape, chalk and safety pins – all of which are available from your local dressmaking and craft store.
Choosing the right thread
The possibilities for thread, according to Simpson, depend on what you're mending. Although you don't need an exact match for every project, if you have a colour scheme in your wardrobe, it's wise to match the thread palette to it to some degree.
Some people also prefer to keep some scraps on hand for their mending projects. 'If you want things to look repurposed/upcycled, then these items can be handy and fun,' says Vild. However, if you are after a neater look, she doesn't think keeping these scraps of fabric around will be helpful to you in the long run.

Storing your mending kit
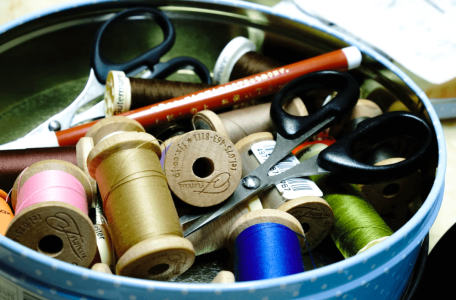
When it comes to storing your mending kit, Vild enjoys vintage tins — which could also be useful for keeping track of what items are left in your kit.
Simpson, on the other hand, prefers a small container like a biscuit tin or a lunchbox. However, if you are using scissors with a large handle, make sure to look for a case that will accommodate the size of these tools.
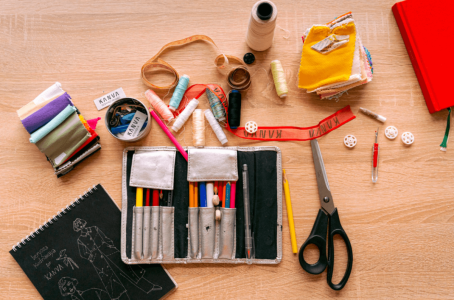
Alternatively, Simpson also likes tool rolls — soft cases with specific compartments for your sewing items that can 'be rolled up neatly'.
Oh, and don't forget to have a big jar filled with buttons! It's a money saver and can also be a soothing experience when looking for the perfect matching set.
Using the tools correctly and safely
Safety should always be your priority when using sewing tools. Before you start your project, make sure to familiarise yourself with the specific tools you're using and how to use them safely and correctly.
In case you're interested in learning the basics of sewing and mending clothes, consider taking a class with a professional, as they can help explain the proper techniques and provide guidance.
The internet is also a great place to look for tutorials and instructional videos to get you started. The video below is a good example!
Credit: The Daily Sew.
Members, before you go out and shop for those fancy and expensive new clothes, why not try repairing your old items first and build your own at-home mending kit?
We can all agree that being able to mend a small tear or missing button in your own home is not only a great way to save time and money, but it can also provide a great sense of satisfaction!
So what do you think? Are you giving this hobby a try? Let us know in the comments!
If you've been meaning to start mending clothing, it's not as hard as you may think. All it really takes is a good set of tools, some practice and a 'can do' attitude.
Rel Vild, the owner of Loom Fabrics, and Holly Simpson, the owner of the repair service Hot Dog Workshop – both experts in the craft of mending – are here to explain how to build an at-home repair kit.
Of course, the most important aspect of mending your own clothes is having the right tools. However, you don't need to break the budget for a quality repair job.
If you're on a budget (which we all are, these days), Rel Vild recommends looking for secondhand items from haberdashery stores or specialist retailers. You may find some vintage tools in great condition, which will perform the tasks perfectly and save you some money too.
What tools do you need?
The first and most important item for your mending kit is good quality tailoring shears. These scissors should only be used for cutting fabrics – don't let the grandkids use them for craftwork or to cut paper, as it may cause them to become blunt quickly.
In addition to the shears, we recommend getting a smaller pair of scissors or even a thread snipper. This is great for trimming up after use as well as for cutting threads.
Another indispensable tool for this hobby is an unpicker, a small tool with a pointed metal hook that makes easy work of stitching errors. Vild prefers larger unpickers because they are easier to manage, unlike the tiny ones which are harder to control.
When shopping for needles, she suggests buying them in packets that contain a variety of sizes, since it can take some time to figure out which ones operate best for you.
She also advises to only purchase zippers when you need them, according to the needs of the project at hand. 'Otherwise, they will sit unused,' she says.

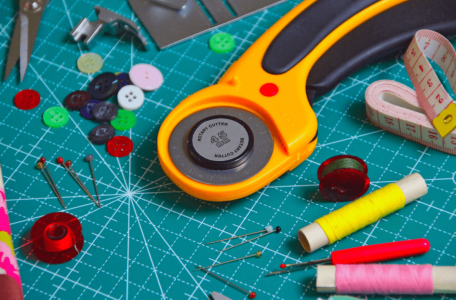
Your investment in high-quality needles, thread, and other sewing essentials will benefit you in the long run. Credit: Pexels/Adonyi Gábor.
Other items you will need are pins with glass heads, a tape measure, and maybe even a small embroidery hoop. Most haberdasheries will stock these items as well as things like a needle threader and a thimble.
Other helpful items include iron-on patches, iron-on mending tape, chalk and safety pins – all of which are available from your local dressmaking and craft store.
Choosing the right thread
The possibilities for thread, according to Simpson, depend on what you're mending. Although you don't need an exact match for every project, if you have a colour scheme in your wardrobe, it's wise to match the thread palette to it to some degree.
Some people also prefer to keep some scraps on hand for their mending projects. 'If you want things to look repurposed/upcycled, then these items can be handy and fun,' says Vild. However, if you are after a neater look, she doesn't think keeping these scraps of fabric around will be helpful to you in the long run.

Make sure to keep all of your sewing and mending supplies in one container so you don't misplace them. Credit: Unsplash/KWON JUNHO.
Storing your mending kit
When it comes to storing your mending kit, Vild enjoys vintage tins — which could also be useful for keeping track of what items are left in your kit.
Simpson, on the other hand, prefers a small container like a biscuit tin or a lunchbox. However, if you are using scissors with a large handle, make sure to look for a case that will accommodate the size of these tools.
Alternatively, Simpson also likes tool rolls — soft cases with specific compartments for your sewing items that can 'be rolled up neatly'.
Oh, and don't forget to have a big jar filled with buttons! It's a money saver and can also be a soothing experience when looking for the perfect matching set.
Using the tools correctly and safely
Safety should always be your priority when using sewing tools. Before you start your project, make sure to familiarise yourself with the specific tools you're using and how to use them safely and correctly.
In case you're interested in learning the basics of sewing and mending clothes, consider taking a class with a professional, as they can help explain the proper techniques and provide guidance.
The internet is also a great place to look for tutorials and instructional videos to get you started. The video below is a good example!
Credit: The Daily Sew.
Members, before you go out and shop for those fancy and expensive new clothes, why not try repairing your old items first and build your own at-home mending kit?
We can all agree that being able to mend a small tear or missing button in your own home is not only a great way to save time and money, but it can also provide a great sense of satisfaction!
So what do you think? Are you giving this hobby a try? Let us know in the comments!


