Say goodbye to sticky residue! Discover a professional organiser's secret to removing adhesive labels in seconds

As anyone familiar with organising their home knows, brand labels are inconvenient eyesores (not to mention downright annoying) when all you want to do is neatly arrange your products. And besides that, labels (and their sticky remnants) can ruin otherwise perfectly good items (we’ve all had a new book tainted with residue from the price tag, right?)!

It can also be incredibly frustrating trying to peel off those pesky adhesive labels from our favourite purchases.

But why ruin our fingernails or resort to using time-consuming methods when there's a pro tip from an expert organiser right at our fingertips?


Anita Birges, a Sydney-based pro organiser with over 111,000 followers on social media, shares her easy-to-follow tips and tricks to help make our lives clean and clutter-free.

Recently, she divulged an ‘oldie but a goodie’ method for removing adhesive labels within seconds using just a single tool – and you won’t believe how simple it is!


adhesive1.jpg
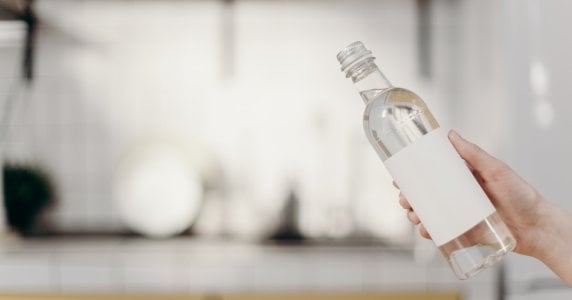
Ever wanted to remove pesky labels with ease? This pro cleaner has a tip for you! Credit: cottonbro studio/Pexels

‘Don't you hate when you're trying to take labels off, and it leaves a sticky residue?’ She said in a video she uploaded to her Instagram account, a sentiment many can relate with.

‘I've got just the thing for you, and all you need is a hair dryer,’ she continued.


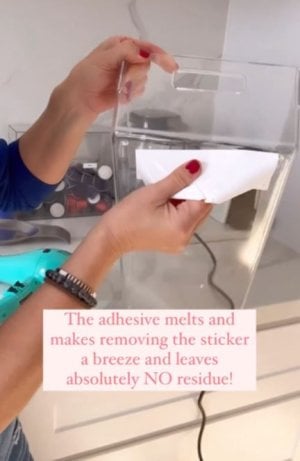
To demonstrate the trick, Birges focused her hair dryer at medium heat on the adhesive label of a clear Kmart organising container.

She advised repeating the process at least three to four times to ensure the label comes off cleanly and leaves no residue behind.

When the adhesive is sufficiently melted, the label will peel off with ease, leaving absolutely no sticky residue behind. As someone who despises leaving brand stickers on the items she organises, this trick is nothing short of a lifesaver for Birges.


adhesive2.jpg
Anita showed how the adhesive sticker ‘melted’ right off. Credit: mise_en_place_aus/Instagram

‘Brand stickers are unsightly and visual clutter,’ she wrote in the caption of her video.

‘Products come with loads of brand stickers on them, and I always need to remove them in a hurry. It's an absolute non-negotiable for me to leave them on.’


The reactions to her adhesive-removing trick poured in, with grateful followers showing their appreciation.

‘Genius!’ Wrote one person, while another enthused, ‘This lady is my cleaning/organising guru... she just gets it!’

‘Definitely going to try this one!’ One shared.

Other internet users confirmed the effectiveness of Anita’s tip.

‘Yes! This works so well, and I use it all the time,’ someone wrote.

‘What if you’ve been scraping at it and now just have tiny sticky bits of label and adhesive on there? Have tried detergent, boiling water and dishwasher and still not coming off,’ one person asked.


If you, just like this one commenter, have already tried other methods of label removal and now have a mess of tiny sticky bits and adhesive residue, never fear. Birges also has a solution for you.

‘For stickers and labels that you have already tried to peel off in the past, and you have that residue or half a sticker still on, I suggest using a “goo remover” like WD40 or go to your local hardware store and pick some up,’ Birges advised.

She also warned against using abrasive methods such as hand sanitiser or rubbing alcohol, which can damage the product. Instead, opt to wipe the residue off with a soft microfibre cloth for best results.

‘Hand sanitiser, rubbing alcohol or anything abrasive does NOT WORK,’ she said.
Key Takeaways
  • Professional organiser Anita Birges shared a tip to remove adhesive labels from new products using a hair dryer.
  • By running the hair dryer on medium heat over the label, it melts the adhesive, allowing it to peel off easily without leaving residue.
  • Many in the comments section were thankful to learn of this hack and praised Birges for her organising tips.
  • Birges suggests using a 'goo remover' like WD40 for removing sticky residue from previous label removal attempts and for avoiding damaging the product.
Did you know about this tip? Or do you have another method for removing stubborn adhesive stickers? Share your thoughts with us in the comments below!
 
Sponsored
As anyone familiar with organising their home knows, brand labels are inconvenient eyesores (not to mention downright annoying) when all you want to do is neatly arrange your products. And besides that, labels (and their sticky remnants) can ruin otherwise perfectly good items (we’ve all had a new book tainted with residue from the price tag, right?)!

It can also be incredibly frustrating trying to peel off those pesky adhesive labels from our favourite purchases.

But why ruin our fingernails or resort to using time-consuming methods when there's a pro tip from an expert organiser right at our fingertips?


Anita Birges, a Sydney-based pro organiser with over 111,000 followers on social media, shares her easy-to-follow tips and tricks to help make our lives clean and clutter-free.

Recently, she divulged an ‘oldie but a goodie’ method for removing adhesive labels within seconds using just a single tool – and you won’t believe how simple it is!


View attachment 22410
Ever wanted to remove pesky labels with ease? This pro cleaner has a tip for you! Credit: cottonbro studio/Pexels

‘Don't you hate when you're trying to take labels off, and it leaves a sticky residue?’ She said in a video she uploaded to her Instagram account, a sentiment many can relate with.

‘I've got just the thing for you, and all you need is a hair dryer,’ she continued.


To demonstrate the trick, Birges focused her hair dryer at medium heat on the adhesive label of a clear Kmart organising container.

She advised repeating the process at least three to four times to ensure the label comes off cleanly and leaves no residue behind.

When the adhesive is sufficiently melted, the label will peel off with ease, leaving absolutely no sticky residue behind. As someone who despises leaving brand stickers on the items she organises, this trick is nothing short of a lifesaver for Birges.


View attachment 22411
Anita showed how the adhesive sticker ‘melted’ right off. Credit: mise_en_place_aus/Instagram

‘Brand stickers are unsightly and visual clutter,’ she wrote in the caption of her video.

‘Products come with loads of brand stickers on them, and I always need to remove them in a hurry. It's an absolute non-negotiable for me to leave them on.’


The reactions to her adhesive-removing trick poured in, with grateful followers showing their appreciation.

‘Genius!’ Wrote one person, while another enthused, ‘This lady is my cleaning/organising guru... she just gets it!’

‘Definitely going to try this one!’ One shared.

Other internet users confirmed the effectiveness of Anita’s tip.

‘Yes! This works so well, and I use it all the time,’ someone wrote.

‘What if you’ve been scraping at it and now just have tiny sticky bits of label and adhesive on there? Have tried detergent, boiling water and dishwasher and still not coming off,’ one person asked.


If you, just like this one commenter, have already tried other methods of label removal and now have a mess of tiny sticky bits and adhesive residue, never fear. Birges also has a solution for you.

‘For stickers and labels that you have already tried to peel off in the past, and you have that residue or half a sticker still on, I suggest using a “goo remover” like WD40 or go to your local hardware store and pick some up,’ Birges advised.

She also warned against using abrasive methods such as hand sanitiser or rubbing alcohol, which can damage the product. Instead, opt to wipe the residue off with a soft microfibre cloth for best results.

‘Hand sanitiser, rubbing alcohol or anything abrasive does NOT WORK,’ she said.
Key Takeaways

  • Professional organiser Anita Birges shared a tip to remove adhesive labels from new products using a hair dryer.
  • By running the hair dryer on medium heat over the label, it melts the adhesive, allowing it to peel off easily without leaving residue.
  • Many in the comments section were thankful to learn of this hack and praised Birges for her organising tips.
  • Birges suggests using a 'goo remover' like WD40 for removing sticky residue from previous label removal attempts and for avoiding damaging the product.
Did you know about this tip? Or do you have another method for removing stubborn adhesive stickers? Share your thoughts with us in the comments below!
Eucalyptus oil (100%) works a treat.
 
As anyone familiar with organising their home knows, brand labels are inconvenient eyesores (not to mention downright annoying) when all you want to do is neatly arrange your products. And besides that, labels (and their sticky remnants) can ruin otherwise perfectly good items (we’ve all had a new book tainted with residue from the price tag, right?)!

It can also be incredibly frustrating trying to peel off those pesky adhesive labels from our favourite purchases.

But why ruin our fingernails or resort to using time-consuming methods when there's a pro tip from an expert organiser right at our fingertips?


Anita Birges, a Sydney-based pro organiser with over 111,000 followers on social media, shares her easy-to-follow tips and tricks to help make our lives clean and clutter-free.

Recently, she divulged an ‘oldie but a goodie’ method for removing adhesive labels within seconds using just a single tool – and you won’t believe how simple it is!


View attachment 22410
Ever wanted to remove pesky labels with ease? This pro cleaner has a tip for you! Credit: cottonbro studio/Pexels

‘Don't you hate when you're trying to take labels off, and it leaves a sticky residue?’ She said in a video she uploaded to her Instagram account, a sentiment many can relate with.

‘I've got just the thing for you, and all you need is a hair dryer,’ she continued.


To demonstrate the trick, Birges focused her hair dryer at medium heat on the adhesive label of a clear Kmart organising container.

She advised repeating the process at least three to four times to ensure the label comes off cleanly and leaves no residue behind.

When the adhesive is sufficiently melted, the label will peel off with ease, leaving absolutely no sticky residue behind. As someone who despises leaving brand stickers on the items she organises, this trick is nothing short of a lifesaver for Birges.


View attachment 22411
Anita showed how the adhesive sticker ‘melted’ right off. Credit: mise_en_place_aus/Instagram

‘Brand stickers are unsightly and visual clutter,’ she wrote in the caption of her video.

‘Products come with loads of brand stickers on them, and I always need to remove them in a hurry. It's an absolute non-negotiable for me to leave them on.’


The reactions to her adhesive-removing trick poured in, with grateful followers showing their appreciation.

‘Genius!’ Wrote one person, while another enthused, ‘This lady is my cleaning/organising guru... she just gets it!’

‘Definitely going to try this one!’ One shared.

Other internet users confirmed the effectiveness of Anita’s tip.

‘Yes! This works so well, and I use it all the time,’ someone wrote.

‘What if you’ve been scraping at it and now just have tiny sticky bits of label and adhesive on there? Have tried detergent, boiling water and dishwasher and still not coming off,’ one person asked.


If you, just like this one commenter, have already tried other methods of label removal and now have a mess of tiny sticky bits and adhesive residue, never fear. Birges also has a solution for you.

‘For stickers and labels that you have already tried to peel off in the past, and you have that residue or half a sticker still on, I suggest using a “goo remover” like WD40 or go to your local hardware store and pick some up,’ Birges advised.

She also warned against using abrasive methods such as hand sanitiser or rubbing alcohol, which can damage the product. Instead, opt to wipe the residue off with a soft microfibre cloth for best results.

‘Hand sanitiser, rubbing alcohol or anything abrasive does NOT WORK,’ she said.
Key Takeaways

  • Professional organiser Anita Birges shared a tip to remove adhesive labels from new products using a hair dryer.
  • By running the hair dryer on medium heat over the label, it melts the adhesive, allowing it to peel off easily without leaving residue.
  • Many in the comments section were thankful to learn of this hack and praised Birges for her organising tips.
  • Birges suggests using a 'goo remover' like WD40 for removing sticky residue from previous label removal attempts and for avoiding damaging the product.
Did you know about this tip? Or do you have another method for removing stubborn adhesive stickers? Share your thoughts with us in the comments below!
 
Try using eucalyptus on a rag and rub. Works on glass very well but be careful as eucalyptus will melt some plastics.
 
  • Like
Reactions: RTS
As anyone familiar with organising their home knows, brand labels are inconvenient eyesores (not to mention downright annoying) when all you want to do is neatly arrange your products. And besides that, labels (and their sticky remnants) can ruin otherwise perfectly good items (we’ve all had a new book tainted with residue from the price tag, right?)!

It can also be incredibly frustrating trying to peel off those pesky adhesive labels from our favourite purchases.

But why ruin our fingernails or resort to using time-consuming methods when there's a pro tip from an expert organiser right at our fingertips?


Anita Birges, a Sydney-based pro organiser with over 111,000 followers on social media, shares her easy-to-follow tips and tricks to help make our lives clean and clutter-free.

Recently, she divulged an ‘oldie but a goodie’ method for removing adhesive labels within seconds using just a single tool – and you won’t believe how simple it is!


View attachment 22410
Ever wanted to remove pesky labels with ease? This pro cleaner has a tip for you! Credit: cottonbro studio/Pexels

‘Don't you hate when you're trying to take labels off, and it leaves a sticky residue?’ She said in a video she uploaded to her Instagram account, a sentiment many can relate with.

‘I've got just the thing for you, and all you need is a hair dryer,’ she continued.


To demonstrate the trick, Birges focused her hair dryer at medium heat on the adhesive label of a clear Kmart organising container.

She advised repeating the process at least three to four times to ensure the label comes off cleanly and leaves no residue behind.

When the adhesive is sufficiently melted, the label will peel off with ease, leaving absolutely no sticky residue behind. As someone who despises leaving brand stickers on the items she organises, this trick is nothing short of a lifesaver for Birges.


View attachment 22411
Anita showed how the adhesive sticker ‘melted’ right off. Credit: mise_en_place_aus/Instagram

‘Brand stickers are unsightly and visual clutter,’ she wrote in the caption of her video.

‘Products come with loads of brand stickers on them, and I always need to remove them in a hurry. It's an absolute non-negotiable for me to leave them on.’


The reactions to her adhesive-removing trick poured in, with grateful followers showing their appreciation.

‘Genius!’ Wrote one person, while another enthused, ‘This lady is my cleaning/organising guru... she just gets it!’

‘Definitely going to try this one!’ One shared.

Other internet users confirmed the effectiveness of Anita’s tip.

‘Yes! This works so well, and I use it all the time,’ someone wrote.

‘What if you’ve been scraping at it and now just have tiny sticky bits of label and adhesive on there? Have tried detergent, boiling water and dishwasher and still not coming off,’ one person asked.


If you, just like this one commenter, have already tried other methods of label removal and now have a mess of tiny sticky bits and adhesive residue, never fear. Birges also has a solution for you.

‘For stickers and labels that you have already tried to peel off in the past, and you have that residue or half a sticker still on, I suggest using a “goo remover” like WD40 or go to your local hardware store and pick some up,’ Birges advised.

She also warned against using abrasive methods such as hand sanitiser or rubbing alcohol, which can damage the product. Instead, opt to wipe the residue off with a soft microfibre cloth for best results.

‘Hand sanitiser, rubbing alcohol or anything abrasive does NOT WORK,’ she said.
Key Takeaways

  • Professional organiser Anita Birges shared a tip to remove adhesive labels from new products using a hair dryer.
  • By running the hair dryer on medium heat over the label, it melts the adhesive, allowing it to peel off easily without leaving residue.
  • Many in the comments section were thankful to learn of this hack and praised Birges for her organising tips.
  • Birges suggests using a 'goo remover' like WD40 for removing sticky residue from previous label removal attempts and for avoiding damaging the product.
Did you know about this tip? Or do you have another method for removing stubborn adhesive stickers? Share your thoughts with us in the comments below!
Petrol, but outside and no flames. Cheapest way and just dampen a cloth.
 
  • Like
Reactions: Jennie
I usually use eucalyptus oil, but I'm going to try the hairdryer to remove residue from 33 little stickers on an exposed wood beam next to a plaster wall. I've been wondering about the best way to attack them.
 
As anyone familiar with organising their home knows, brand labels are inconvenient eyesores (not to mention downright annoying) when all you want to do is neatly arrange your products. And besides that, labels (and their sticky remnants) can ruin otherwise perfectly good items (we’ve all had a new book tainted with residue from the price tag, right?)!

It can also be incredibly frustrating trying to peel off those pesky adhesive labels from our favourite purchases.

But why ruin our fingernails or resort to using time-consuming methods when there's a pro tip from an expert organiser right at our fingertips?


Anita Birges, a Sydney-based pro organiser with over 111,000 followers on social media, shares her easy-to-follow tips and tricks to help make our lives clean and clutter-free.

Recently, she divulged an ‘oldie but a goodie’ method for removing adhesive labels within seconds using just a single tool – and you won’t believe how simple it is!


View attachment 22410
Ever wanted to remove pesky labels with ease? This pro cleaner has a tip for you! Credit: cottonbro studio/Pexels

‘Don't you hate when you're trying to take labels off, and it leaves a sticky residue?’ She said in a video she uploaded to her Instagram account, a sentiment many can relate with.

‘I've got just the thing for you, and all you need is a hair dryer,’ she continued.


To demonstrate the trick, Birges focused her hair dryer at medium heat on the adhesive label of a clear Kmart organising container.

She advised repeating the process at least three to four times to ensure the label comes off cleanly and leaves no residue behind.

When the adhesive is sufficiently melted, the label will peel off with ease, leaving absolutely no sticky residue behind. As someone who despises leaving brand stickers on the items she organises, this trick is nothing short of a lifesaver for Birges.


View attachment 22411
Anita showed how the adhesive sticker ‘melted’ right off. Credit: mise_en_place_aus/Instagram

‘Brand stickers are unsightly and visual clutter,’ she wrote in the caption of her video.

‘Products come with loads of brand stickers on them, and I always need to remove them in a hurry. It's an absolute non-negotiable for me to leave them on.’


The reactions to her adhesive-removing trick poured in, with grateful followers showing their appreciation.

‘Genius!’ Wrote one person, while another enthused, ‘This lady is my cleaning/organising guru... she just gets it!’

‘Definitely going to try this one!’ One shared.

Other internet users confirmed the effectiveness of Anita’s tip.

‘Yes! This works so well, and I use it all the time,’ someone wrote.

‘What if you’ve been scraping at it and now just have tiny sticky bits of label and adhesive on there? Have tried detergent, boiling water and dishwasher and still not coming off,’ one person asked.


If you, just like this one commenter, have already tried other methods of label removal and now have a mess of tiny sticky bits and adhesive residue, never fear. Birges also has a solution for you.

‘For stickers and labels that you have already tried to peel off in the past, and you have that residue or half a sticker still on, I suggest using a “goo remover” like WD40 or go to your local hardware store and pick some up,’ Birges advised.

She also warned against using abrasive methods such as hand sanitiser or rubbing alcohol, which can damage the product. Instead, opt to wipe the residue off with a soft microfibre cloth for best results.

‘Hand sanitiser, rubbing alcohol or anything abrasive does NOT WORK,’ she said.
Key Takeaways

  • Professional organiser Anita Birges shared a tip to remove adhesive labels from new products using a hair dryer.
  • By running the hair dryer on medium heat over the label, it melts the adhesive, allowing it to peel off easily without leaving residue.
  • Many in the comments section were thankful to learn of this hack and praised Birges for her organising tips.
  • Birges suggests using a 'goo remover' like WD40 for removing sticky residue from previous label removal attempts and for avoiding damaging the product.
Did you know about this tip? Or do you have another method for removing stubborn adhesive stickers? Share your thoughts with us in the comments below!
I use Eucalyptus Oil to remove the residue and it works wonders
As anyone familiar with organising their home knows, brand labels are inconvenient eyesores (not to mention downright annoying) when all you want to do is neatly arrange your products. And besides that, labels (and their sticky remnants) can ruin otherwise perfectly good items (we’ve all had a new book tainted with residue from the price tag, right?)!

It can also be incredibly frustrating trying to peel off those pesky adhesive labels from our favourite purchases.

But why ruin our fingernails or resort to using time-consuming methods when there's a pro tip from an expert organiser right at our fingertips?


Anita Birges, a Sydney-based pro organiser with over 111,000 followers on social media, shares her easy-to-follow tips and tricks to help make our lives clean and clutter-free.

Recently, she divulged an ‘oldie but a goodie’ method for removing adhesive labels within seconds using just a single tool – and you won’t believe how simple it is!


View attachment 22410
Ever wanted to remove pesky labels with ease? This pro cleaner has a tip for you! Credit: cottonbro studio/Pexels

‘Don't you hate when you're trying to take labels off, and it leaves a sticky residue?’ She said in a video she uploaded to her Instagram account, a sentiment many can relate with.

‘I've got just the thing for you, and all you need is a hair dryer,’ she continued.


To demonstrate the trick, Birges focused her hair dryer at medium heat on the adhesive label of a clear Kmart organising container.

She advised repeating the process at least three to four times to ensure the label comes off cleanly and leaves no residue behind.

When the adhesive is sufficiently melted, the label will peel off with ease, leaving absolutely no sticky residue behind. As someone who despises leaving brand stickers on the items she organises, this trick is nothing short of a lifesaver for Birges.


View attachment 22411
Anita showed how the adhesive sticker ‘melted’ right off. Credit: mise_en_place_aus/Instagram

‘Brand stickers are unsightly and visual clutter,’ she wrote in the caption of her video.

‘Products come with loads of brand stickers on them, and I always need to remove them in a hurry. It's an absolute non-negotiable for me to leave them on.’


The reactions to her adhesive-removing trick poured in, with grateful followers showing their appreciation.

‘Genius!’ Wrote one person, while another enthused, ‘This lady is my cleaning/organising guru... she just gets it!’

‘Definitely going to try this one!’ One shared.

Other internet users confirmed the effectiveness of Anita’s tip.

‘Yes! This works so well, and I use it all the time,’ someone wrote.

‘What if you’ve been scraping at it and now just have tiny sticky bits of label and adhesive on there? Have tried detergent, boiling water and dishwasher and still not coming off,’ one person asked.


If you, just like this one commenter, have already tried other methods of label removal and now have a mess of tiny sticky bits and adhesive residue, never fear. Birges also has a solution for you.

‘For stickers and labels that you have already tried to peel off in the past, and you have that residue or half a sticker still on, I suggest using a “goo remover” like WD40 or go to your local hardware store and pick some up,’ Birges advised.

She also warned against using abrasive methods such as hand sanitiser or rubbing alcohol, which can damage the product. Instead, opt to wipe the residue off with a soft microfibre cloth for best results.

‘Hand sanitiser, rubbing alcohol or anything abrasive does NOT WORK,’ she said.
Key Takeaways

  • Professional organiser Anita Birges shared a tip to remove adhesive labels from new products using a hair dryer.
  • By running the hair dryer on medium heat over the label, it melts the adhesive, allowing it to peel off easily without leaving residue.
  • Many in the comments section were thankful to learn of this hack and praised Birges for her organising tips.
  • Birges suggests using a 'goo remover' like WD40 for removing sticky residue from previous label removal attempts and for avoiding damaging the product.
Did you know about this tip? Or do you have another method for removing stubborn adhesive stickers? Share your thoughts with us in the comments below!
 
As anyone familiar with organising their home knows, brand labels are inconvenient eyesores (not to mention downright annoying) when all you want to do is neatly arrange your products. And besides that, labels (and their sticky remnants) can ruin otherwise perfectly good items (we’ve all had a new book tainted with residue from the price tag, right?)!

It can also be incredibly frustrating trying to peel off those pesky adhesive labels from our favourite purchases.

But why ruin our fingernails or resort to using time-consuming methods when there's a pro tip from an expert organiser right at our fingertips?


Anita Birges, a Sydney-based pro organiser with over 111,000 followers on social media, shares her easy-to-follow tips and tricks to help make our lives clean and clutter-free.

Recently, she divulged an ‘oldie but a goodie’ method for removing adhesive labels within seconds using just a single tool – and you won’t believe how simple it is!


View attachment 22410
Ever wanted to remove pesky labels with ease? This pro cleaner has a tip for you! Credit: cottonbro studio/Pexels

‘Don't you hate when you're trying to take labels off, and it leaves a sticky residue?’ She said in a video she uploaded to her Instagram account, a sentiment many can relate with.

‘I've got just the thing for you, and all you need is a hair dryer,’ she continued.


To demonstrate the trick, Birges focused her hair dryer at medium heat on the adhesive label of a clear Kmart organising container.

She advised repeating the process at least three to four times to ensure the label comes off cleanly and leaves no residue behind.

When the adhesive is sufficiently melted, the label will peel off with ease, leaving absolutely no sticky residue behind. As someone who despises leaving brand stickers on the items she organises, this trick is nothing short of a lifesaver for Birges.


View attachment 22411
Anita showed how the adhesive sticker ‘melted’ right off. Credit: mise_en_place_aus/Instagram

‘Brand stickers are unsightly and visual clutter,’ she wrote in the caption of her video.

‘Products come with loads of brand stickers on them, and I always need to remove them in a hurry. It's an absolute non-negotiable for me to leave them on.’


The reactions to her adhesive-removing trick poured in, with grateful followers showing their appreciation.

‘Genius!’ Wrote one person, while another enthused, ‘This lady is my cleaning/organising guru... she just gets it!’

‘Definitely going to try this one!’ One shared.

Other internet users confirmed the effectiveness of Anita’s tip.

‘Yes! This works so well, and I use it all the time,’ someone wrote.

‘What if you’ve been scraping at it and now just have tiny sticky bits of label and adhesive on there? Have tried detergent, boiling water and dishwasher and still not coming off,’ one person asked.


If you, just like this one commenter, have already tried other methods of label removal and now have a mess of tiny sticky bits and adhesive residue, never fear. Birges also has a solution for you.

‘For stickers and labels that you have already tried to peel off in the past, and you have that residue or half a sticker still on, I suggest using a “goo remover” like WD40 or go to your local hardware store and pick some up,’ Birges advised.

She also warned against using abrasive methods such as hand sanitiser or rubbing alcohol, which can damage the product. Instead, opt to wipe the residue off with a soft microfibre cloth for best results.

‘Hand sanitiser, rubbing alcohol or anything abrasive does NOT WORK,’ she said.
Key Takeaways

  • Professional organiser Anita Birges shared a tip to remove adhesive labels from new products using a hair dryer.
  • By running the hair dryer on medium heat over the label, it melts the adhesive, allowing it to peel off easily without leaving residue.
  • Many in the comments section were thankful to learn of this hack and praised Birges for her organising tips.
  • Birges suggests using a 'goo remover' like WD40 for removing sticky residue from previous label removal attempts and for avoiding damaging the product.
Did you know about this tip? Or do you have another method for removing stubborn adhesive stickers? Share your thoughts with us in the comments below!
In the days when I used to make mega lots of jams, sauces, chutney, etc I used to fill the laundry trough with warm water and some baby sterilising liquid and soak as many jars and bottles as I could fit in. The labels used to come off easily on most. Of course there was always the odd stubborn one. Unfortunately you probably can’t get the sterilising liquid these days.
 
I won't be using a hair dryer because we don't own one. Oh gee ... what am I going to do?
Looks like it's the tried and true.
Depending on the surface, it's Eucalyptus oil, or WD40, or just soak in soapy water.
I have more trouble with those stupid child proof lids. Arthritis in the hands makes them older folk proof. Also, those plastic sealed products that need a chain saw to open them.
It sucks when the bones don't co-operate.
 
  • Like
Reactions: Joyem and KaraJenna
As anyone familiar with organising their home knows, brand labels are inconvenient eyesores (not to mention downright annoying) when all you want to do is neatly arrange your products. And besides that, labels (and their sticky remnants) can ruin otherwise perfectly good items (we’ve all had a new book tainted with residue from the price tag, right?)!

It can also be incredibly frustrating trying to peel off those pesky adhesive labels from our favourite purchases.

But why ruin our fingernails or resort to using time-consuming methods when there's a pro tip from an expert organiser right at our fingertips?


Anita Birges, a Sydney-based pro organiser with over 111,000 followers on social media, shares her easy-to-follow tips and tricks to help make our lives clean and clutter-free.

Recently, she divulged an ‘oldie but a goodie’ method for removing adhesive labels within seconds using just a single tool – and you won’t believe how simple it is!


View attachment 22410
Ever wanted to remove pesky labels with ease? This pro cleaner has a tip for you! Credit: cottonbro studio/Pexels

‘Don't you hate when you're trying to take labels off, and it leaves a sticky residue?’ She said in a video she uploaded to her Instagram account, a sentiment many can relate with.

‘I've got just the thing for you, and all you need is a hair dryer,’ she continued.


To demonstrate the trick, Birges focused her hair dryer at medium heat on the adhesive label of a clear Kmart organising container.

She advised repeating the process at least three to four times to ensure the label comes off cleanly and leaves no residue behind.

When the adhesive is sufficiently melted, the label will peel off with ease, leaving absolutely no sticky residue behind. As someone who despises leaving brand stickers on the items she organises, this trick is nothing short of a lifesaver for Birges.


View attachment 22411
Anita showed how the adhesive sticker ‘melted’ right off. Credit: mise_en_place_aus/Instagram

‘Brand stickers are unsightly and visual clutter,’ she wrote in the caption of her video.

‘Products come with loads of brand stickers on them, and I always need to remove them in a hurry. It's an absolute non-negotiable for me to leave them on.’


The reactions to her adhesive-removing trick poured in, with grateful followers showing their appreciation.

‘Genius!’ Wrote one person, while another enthused, ‘This lady is my cleaning/organising guru... she just gets it!’

‘Definitely going to try this one!’ One shared.

Other internet users confirmed the effectiveness of Anita’s tip.

‘Yes! This works so well, and I use it all the time,’ someone wrote.

‘What if you’ve been scraping at it and now just have tiny sticky bits of label and adhesive on there? Have tried detergent, boiling water and dishwasher and still not coming off,’ one person asked.


If you, just like this one commenter, have already tried other methods of label removal and now have a mess of tiny sticky bits and adhesive residue, never fear. Birges also has a solution for you.

‘For stickers and labels that you have already tried to peel off in the past, and you have that residue or half a sticker still on, I suggest using a “goo remover” like WD40 or go to your local hardware store and pick some up,’ Birges advised.

She also warned against using abrasive methods such as hand sanitiser or rubbing alcohol, which can damage the product. Instead, opt to wipe the residue off with a soft microfibre cloth for best results.

‘Hand sanitiser, rubbing alcohol or anything abrasive does NOT WORK,’ she said.
Key Takeaways

  • Professional organiser Anita Birges shared a tip to remove adhesive labels from new products using a hair dryer.
  • By running the hair dryer on medium heat over the label, it melts the adhesive, allowing it to peel off easily without leaving residue.
  • Many in the comments section were thankful to learn of this hack and praised Birges for her organising tips.
  • Birges suggests using a 'goo remover' like WD40 for removing sticky residue from previous label removal attempts and for avoiding damaging the product.
Did you know about this tip? Or do you have another method for removing stubborn adhesive stickers? Share your thoughts with us in the comments below!
Even easier & quicker just Dab on eucalyptus oil. Removes it, nothing left.
 
As anyone familiar with organising their home knows, brand labels are inconvenient eyesores (not to mention downright annoying) when all you want to do is neatly arrange your products. And besides that, labels (and their sticky remnants) can ruin otherwise perfectly good items (we’ve all had a new book tainted with residue from the price tag, right?)!

It can also be incredibly frustrating trying to peel off those pesky adhesive labels from our favourite purchases.

But why ruin our fingernails or resort to using time-consuming methods when there's a pro tip from an expert organiser right at our fingertips?


Anita Birges, a Sydney-based pro organiser with over 111,000 followers on social media, shares her easy-to-follow tips and tricks to help make our lives clean and clutter-free.

Recently, she divulged an ‘oldie but a goodie’ method for removing adhesive labels within seconds using just a single tool – and you won’t believe how simple it is!


View attachment 22410
Ever wanted to remove pesky labels with ease? This pro cleaner has a tip for you! Credit: cottonbro studio/Pexels

‘Don't you hate when you're trying to take labels off, and it leaves a sticky residue?’ She said in a video she uploaded to her Instagram account, a sentiment many can relate with.

‘I've got just the thing for you, and all you need is a hair dryer,’ she continued.


To demonstrate the trick, Birges focused her hair dryer at medium heat on the adhesive label of a clear Kmart organising container.

She advised repeating the process at least three to four times to ensure the label comes off cleanly and leaves no residue behind.

When the adhesive is sufficiently melted, the label will peel off with ease, leaving absolutely no sticky residue behind. As someone who despises leaving brand stickers on the items she organises, this trick is nothing short of a lifesaver for Birges.


View attachment 22411
Anita showed how the adhesive sticker ‘melted’ right off. Credit: mise_en_place_aus/Instagram

‘Brand stickers are unsightly and visual clutter,’ she wrote in the caption of her video.

‘Products come with loads of brand stickers on them, and I always need to remove them in a hurry. It's an absolute non-negotiable for me to leave them on.’


The reactions to her adhesive-removing trick poured in, with grateful followers showing their appreciation.

‘Genius!’ Wrote one person, while another enthused, ‘This lady is my cleaning/organising guru... she just gets it!’

‘Definitely going to try this one!’ One shared.

Other internet users confirmed the effectiveness of Anita’s tip.

‘Yes! This works so well, and I use it all the time,’ someone wrote.

‘What if you’ve been scraping at it and now just have tiny sticky bits of label and adhesive on there? Have tried detergent, boiling water and dishwasher and still not coming off,’ one person asked.


If you, just like this one commenter, have already tried other methods of label removal and now have a mess of tiny sticky bits and adhesive residue, never fear. Birges also has a solution for you.

‘For stickers and labels that you have already tried to peel off in the past, and you have that residue or half a sticker still on, I suggest using a “goo remover” like WD40 or go to your local hardware store and pick some up,’ Birges advised.

She also warned against using abrasive methods such as hand sanitiser or rubbing alcohol, which can damage the product. Instead, opt to wipe the residue off with a soft microfibre cloth for best results.

‘Hand sanitiser, rubbing alcohol or anything abrasive does NOT WORK,’ she said.
Key Takeaways

  • Professional organiser Anita Birges shared a tip to remove adhesive labels from new products using a hair dryer.
  • By running the hair dryer on medium heat over the label, it melts the adhesive, allowing it to peel off easily without leaving residue.
  • Many in the comments section were thankful to learn of this hack and praised Birges for her organising tips.
  • Birges suggests using a 'goo remover' like WD40 for removing sticky residue from previous label removal attempts and for avoiding damaging the product.
Did you know about this tip? Or do you have another method for removing stubborn adhesive stickers? Share your thoughts with us in the comments below!
Sounds good. But on plastic i still use a cotton ball of Metho or Isopropal alcohol to dissolve sticker residue. Other things i use a small piece of sticky tape that i smear on the patch and rip off like a band-aid (these will not work on books/paper etc). But if you take a price tag/stickers off a book as soon as you get it then it is more than likely going to come off if you peel it slowly and evenly.
 
Euro
As anyone familiar with organising their home knows, brand labels are inconvenient eyesores (not to mention downright annoying) when all you want to do is neatly arrange your products. And besides that, labels (and their sticky remnants) can ruin otherwise perfectly good items (we’ve all had a new book tainted with residue from the price tag, right?)!

It can also be incredibly frustrating trying to peel off those pesky adhesive labels from our favourite purchases.

But why ruin our fingernails or resort to using time-consuming methods when there's a pro tip from an expert organiser right at our fingertips?


Anita Birges, a Sydney-based pro organiser with over 111,000 followers on social media, shares her easy-to-follow tips and tricks to help make our lives clean and clutter-free.

Recently, she divulged an ‘oldie but a goodie’ method for removing adhesive labels within seconds using just a single tool – and you won’t believe how simple it is!


View attachment 22410
Ever wanted to remove pesky labels with ease? This pro cleaner has a tip for you! Credit: cottonbro studio/Pexels

‘Don't you hate when you're trying to take labels off, and it leaves a sticky residue?’ She said in a video she uploaded to her Instagram account, a sentiment many can relate with.

‘I've got just the thing for you, and all you need is a hair dryer,’ she continued.


To demonstrate the trick, Birges focused her hair dryer at medium heat on the adhesive label of a clear Kmart organising container.

She advised repeating the process at least three to four times to ensure the label comes off cleanly and leaves no residue behind.

When the adhesive is sufficiently melted, the label will peel off with ease, leaving absolutely no sticky residue behind. As someone who despises leaving brand stickers on the items she organises, this trick is nothing short of a lifesaver for Birges.


View attachment 22411
Anita showed how the adhesive sticker ‘melted’ right off. Credit: mise_en_place_aus/Instagram

‘Brand stickers are unsightly and visual clutter,’ she wrote in the caption of her video.

‘Products come with loads of brand stickers on them, and I always need to remove them in a hurry. It's an absolute non-negotiable for me to leave them on.’


The reactions to her adhesive-removing trick poured in, with grateful followers showing their appreciation.

‘Genius!’ Wrote one person, while another enthused, ‘This lady is my cleaning/organising guru... she just gets it!’

‘Definitely going to try this one!’ One shared.

Other internet users confirmed the effectiveness of Anita’s tip.

‘Yes! This works so well, and I use it all the time,’ someone wrote.

‘What if you’ve been scraping at it and now just have tiny sticky bits of label and adhesive on there? Have tried detergent, boiling water and dishwasher and still not coming off,’ one person asked.


If you, just like this one commenter, have already tried other methods of label removal and now have a mess of tiny sticky bits and adhesive residue, never fear. Birges also has a solution for you.

‘For stickers and labels that you have already tried to peel off in the past, and you have that residue or half a sticker still on, I suggest using a “goo remover” like WD40 or go to your local hardware store and pick some up,’ Birges advised.

She also warned against using abrasive methods such as hand sanitiser or rubbing alcohol, which can damage the product. Instead, opt to wipe the residue off with a soft microfibre cloth for best results.

‘Hand sanitiser, rubbing alcohol or anything abrasive does NOT WORK,’ she said.
Key Takeaways

  • Professional organiser Anita Birges shared a tip to remove adhesive labels from new products using a hair dryer.
  • By running the hair dryer on medium heat over the label, it melts the adhesive, allowing it to peel off easily without leaving residue.
  • Many in the comments section were thankful to learn of this hack and praised Birges for her organising tips.
  • Birges suggests using a 'goo remover' like WD40 for removing sticky residue from previous label removal attempts and for avoiding damaging the product.
Did you know about this tip? Or do you have another method for removing stubborn adhesive stickers? Share your thoughts with us in the comments below! Eucalyptus
 
As anyone familiar with organising their home knows, brand labels are inconvenient eyesores (not to mention downright annoying) when all you want to do is neatly arrange your products. And besides that, labels (and their sticky remnants) can ruin otherwise perfectly good items (we’ve all had a new book tainted with residue from the price tag, right?)!

It can also be incredibly frustrating trying to peel off those pesky adhesive labels from our favourite purchases.

But why ruin our fingernails or resort to using time-consuming methods when there's a pro tip from an expert organiser right at our fingertips?


Anita Birges, a Sydney-based pro organiser with over 111,000 followers on social media, shares her easy-to-follow tips and tricks to help make our lives clean and clutter-free.

Recently, she divulged an ‘oldie but a goodie’ method for removing adhesive labels within seconds using just a single tool – and you won’t believe how simple it is!


View attachment 22410
Ever wanted to remove pesky labels with ease? This pro cleaner has a tip for you! Credit: cottonbro studio/Pexels

‘Don't you hate when you're trying to take labels off, and it leaves a sticky residue?’ She said in a video she uploaded to her Instagram account, a sentiment many can relate with.

‘I've got just the thing for you, and all you need is a hair dryer,’ she continued.


To demonstrate the trick, Birges focused her hair dryer at medium heat on the adhesive label of a clear Kmart organising container.

She advised repeating the process at least three to four times to ensure the label comes off cleanly and leaves no residue behind.

When the adhesive is sufficiently melted, the label will peel off with ease, leaving absolutely no sticky residue behind. As someone who despises leaving brand stickers on the items she organises, this trick is nothing short of a lifesaver for Birges.


View attachment 22411
Anita showed how the adhesive sticker ‘melted’ right off. Credit: mise_en_place_aus/Instagram

‘Brand stickers are unsightly and visual clutter,’ she wrote in the caption of her video.

‘Products come with loads of brand stickers on them, and I always need to remove them in a hurry. It's an absolute non-negotiable for me to leave them on.’


The reactions to her adhesive-removing trick poured in, with grateful followers showing their appreciation.

‘Genius!’ Wrote one person, while another enthused, ‘This lady is my cleaning/organising guru... she just gets it!’

‘Definitely going to try this one!’ One shared.

Other internet users confirmed the effectiveness of Anita’s tip.

‘Yes! This works so well, and I use it all the time,’ someone wrote.

‘What if you’ve been scraping at it and now just have tiny sticky bits of label and adhesive on there? Have tried detergent, boiling water and dishwasher and still not coming off,’ one person asked.


If you, just like this one commenter, have already tried other methods of label removal and now have a mess of tiny sticky bits and adhesive residue, never fear. Birges also has a solution for you.

‘For stickers and labels that you have already tried to peel off in the past, and you have that residue or half a sticker still on, I suggest using a “goo remover” like WD40 or go to your local hardware store and pick some up,’ Birges advised.

She also warned against using abrasive methods such as hand sanitiser or rubbing alcohol, which can damage the product. Instead, opt to wipe the residue off with a soft microfibre cloth for best results.

‘Hand sanitiser, rubbing alcohol or anything abrasive does NOT WORK,’ she said.
Key Takeaways

  • Professional organiser Anita Birges shared a tip to remove adhesive labels from new products using a hair dryer.
  • By running the hair dryer on medium heat over the label, it melts the adhesive, allowing it to peel off easily without leaving residue.
  • Many in the comments section were thankful to learn of this hack and praised Birges for her organising tips.
  • Birges suggests using a 'goo remover' like WD40 for removing sticky residue from previous label removal attempts and for avoiding damaging the product.
Did you know about this tip? Or do you have another method for removing stubborn adhesive stickers? Share your thoughts with us in the comments below!
I would have said WD40 also. Had a broken weathershield on my car recently. Used the hair dryer to heat up the weathershield and glue and the weathershield peeled off. Then I used WD40 and a rag to remove the excess adhesive. Worked a treat.
 

Join the conversation

News, deals, games, and bargains for Aussies over 60. From everyday expenses like groceries and eating out, to electronics, fashion and travel, the club is all about helping you make your money go further.

Seniors Discount Club

The SDC searches for the best deals, discounts, and bargains for Aussies over 60. From everyday expenses like groceries and eating out, to electronics, fashion and travel, the club is all about helping you make your money go further.
  1. New members
  2. Jokes & fun
  3. Photography
  4. Nostalgia / Yesterday's Australia
  5. Food and Lifestyle
  6. Money Saving Hacks
  7. Offtopic / Everything else
  • We believe that retirement should be a time to relax and enjoy life, not worry about money. That's why we're here to help our members make the most of their retirement years. If you're over 60 and looking for ways to save money, connect with others, and have a laugh, we’d love to have you aboard.
  • Advertise with us

User Menu

Enjoyed Reading our Story?

  • Share this forum to your loved ones.
Change Weather Postcode×
Change Petrol Postcode×